mike liddell

How To Take Better Real Estate Photos With Your Cellphone

We've all been there, you get a new listing and go to the home to take some photos for the MLS. 

You pull out your cellphone and snap a few pics, go to look at them, and the photos tell you nothing about the room you were in.

The photos are dark, grainy, and you barely see any of the room.

Today we're going to go through a few steps to make these photos look better and hopefully get more views on your listings.


Shoot As Wide As You Can


Professional interior photographers shoot with very wide angle lenses, much wider than the lens on your phone.

To give you an idea just how much wider, many photographers shoot at 15mm when most cellphones have a field of view of around 30mm.

Compare these two photos taken with a cellphone and with a DSLR with a wide angle lens.

Real Estate Photo Taken With A Cellphone
Real Estate Photo Taken With A DSLR

There's a few thing you can do to shoot as wide as you can:

1. Stand as far back in a corner as you can. Sometimes you can take a photo from standing just outside the door.

2. Try using the panorama feature if you have it.

3. Use a wide angle lens adapter. Some companies make wide angle lens adapters for cell phones that clip over your phone's camera lens.


Hold Your Camera Level


When you take a photo with your camera at an angle, the vertical lines in the photo will be bowed in or out.

This can make the house appear to be caving in on itself.

angled camera, angled vertical lines.

Or look like the house is about to fall over.

Property photo, bad vertical lines

The solution to this problem is to make sure that your camera lens is perfectly parallel with the floor.

Real Estate Photo, perfect vertical lines


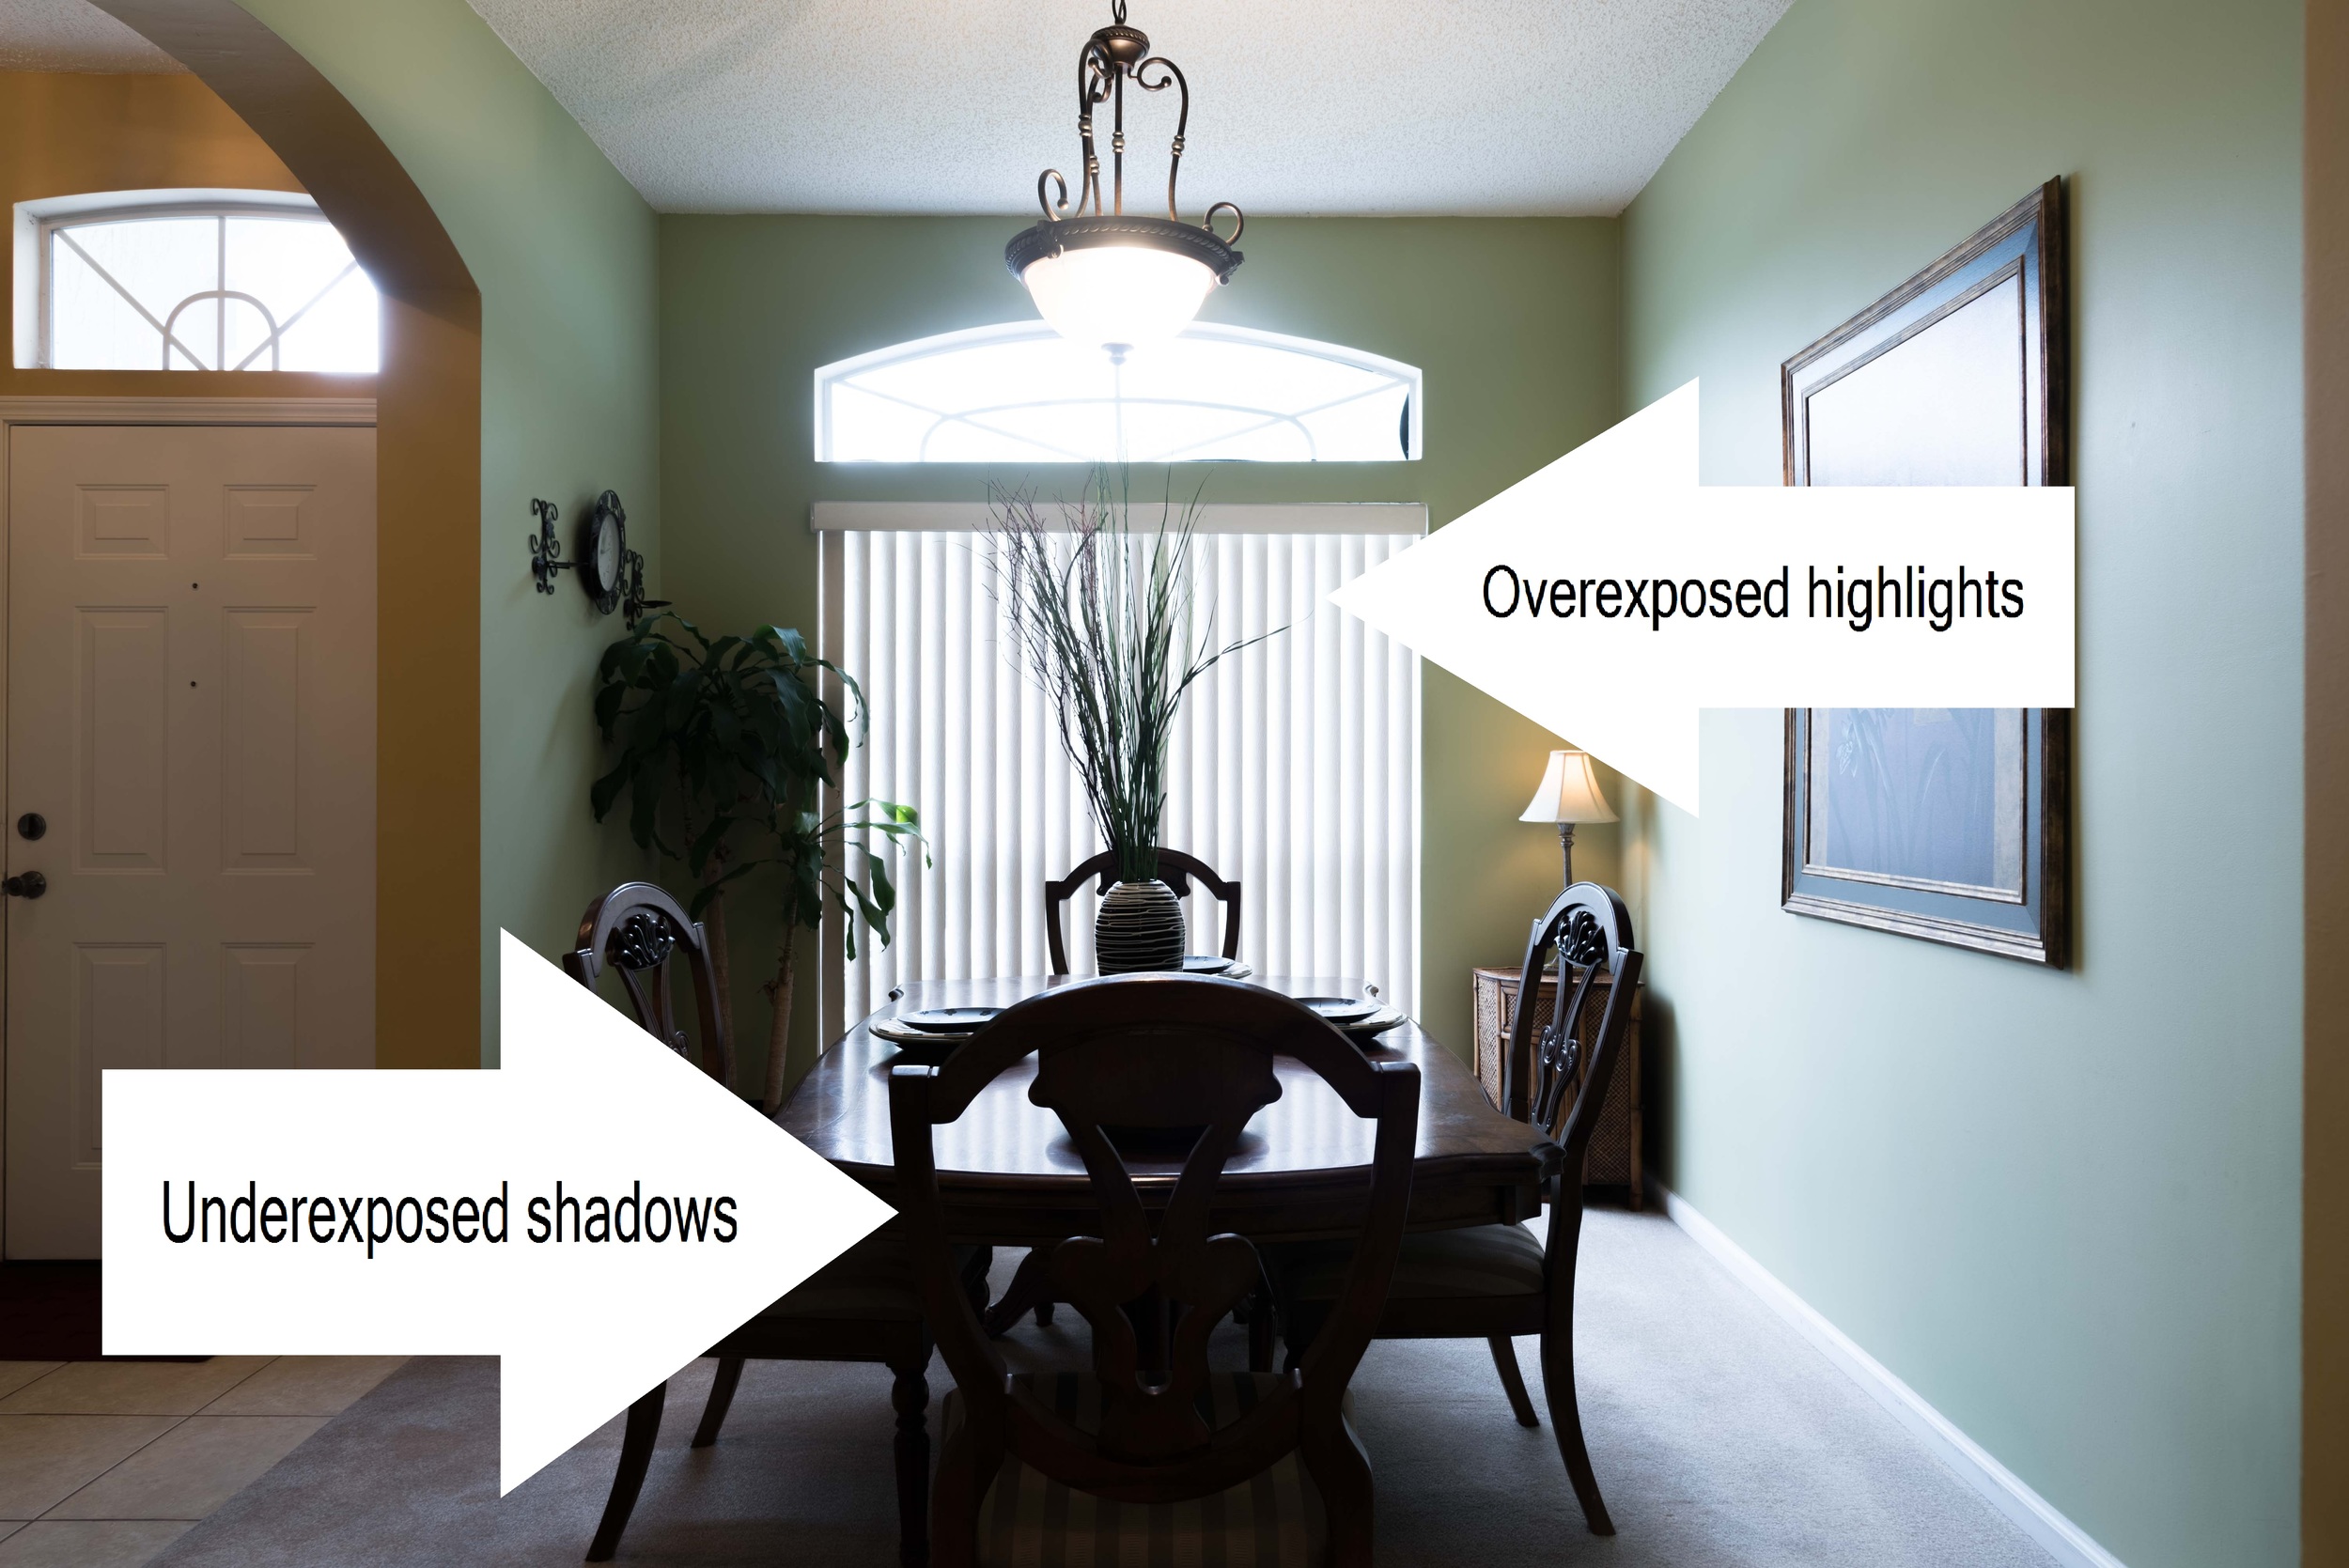
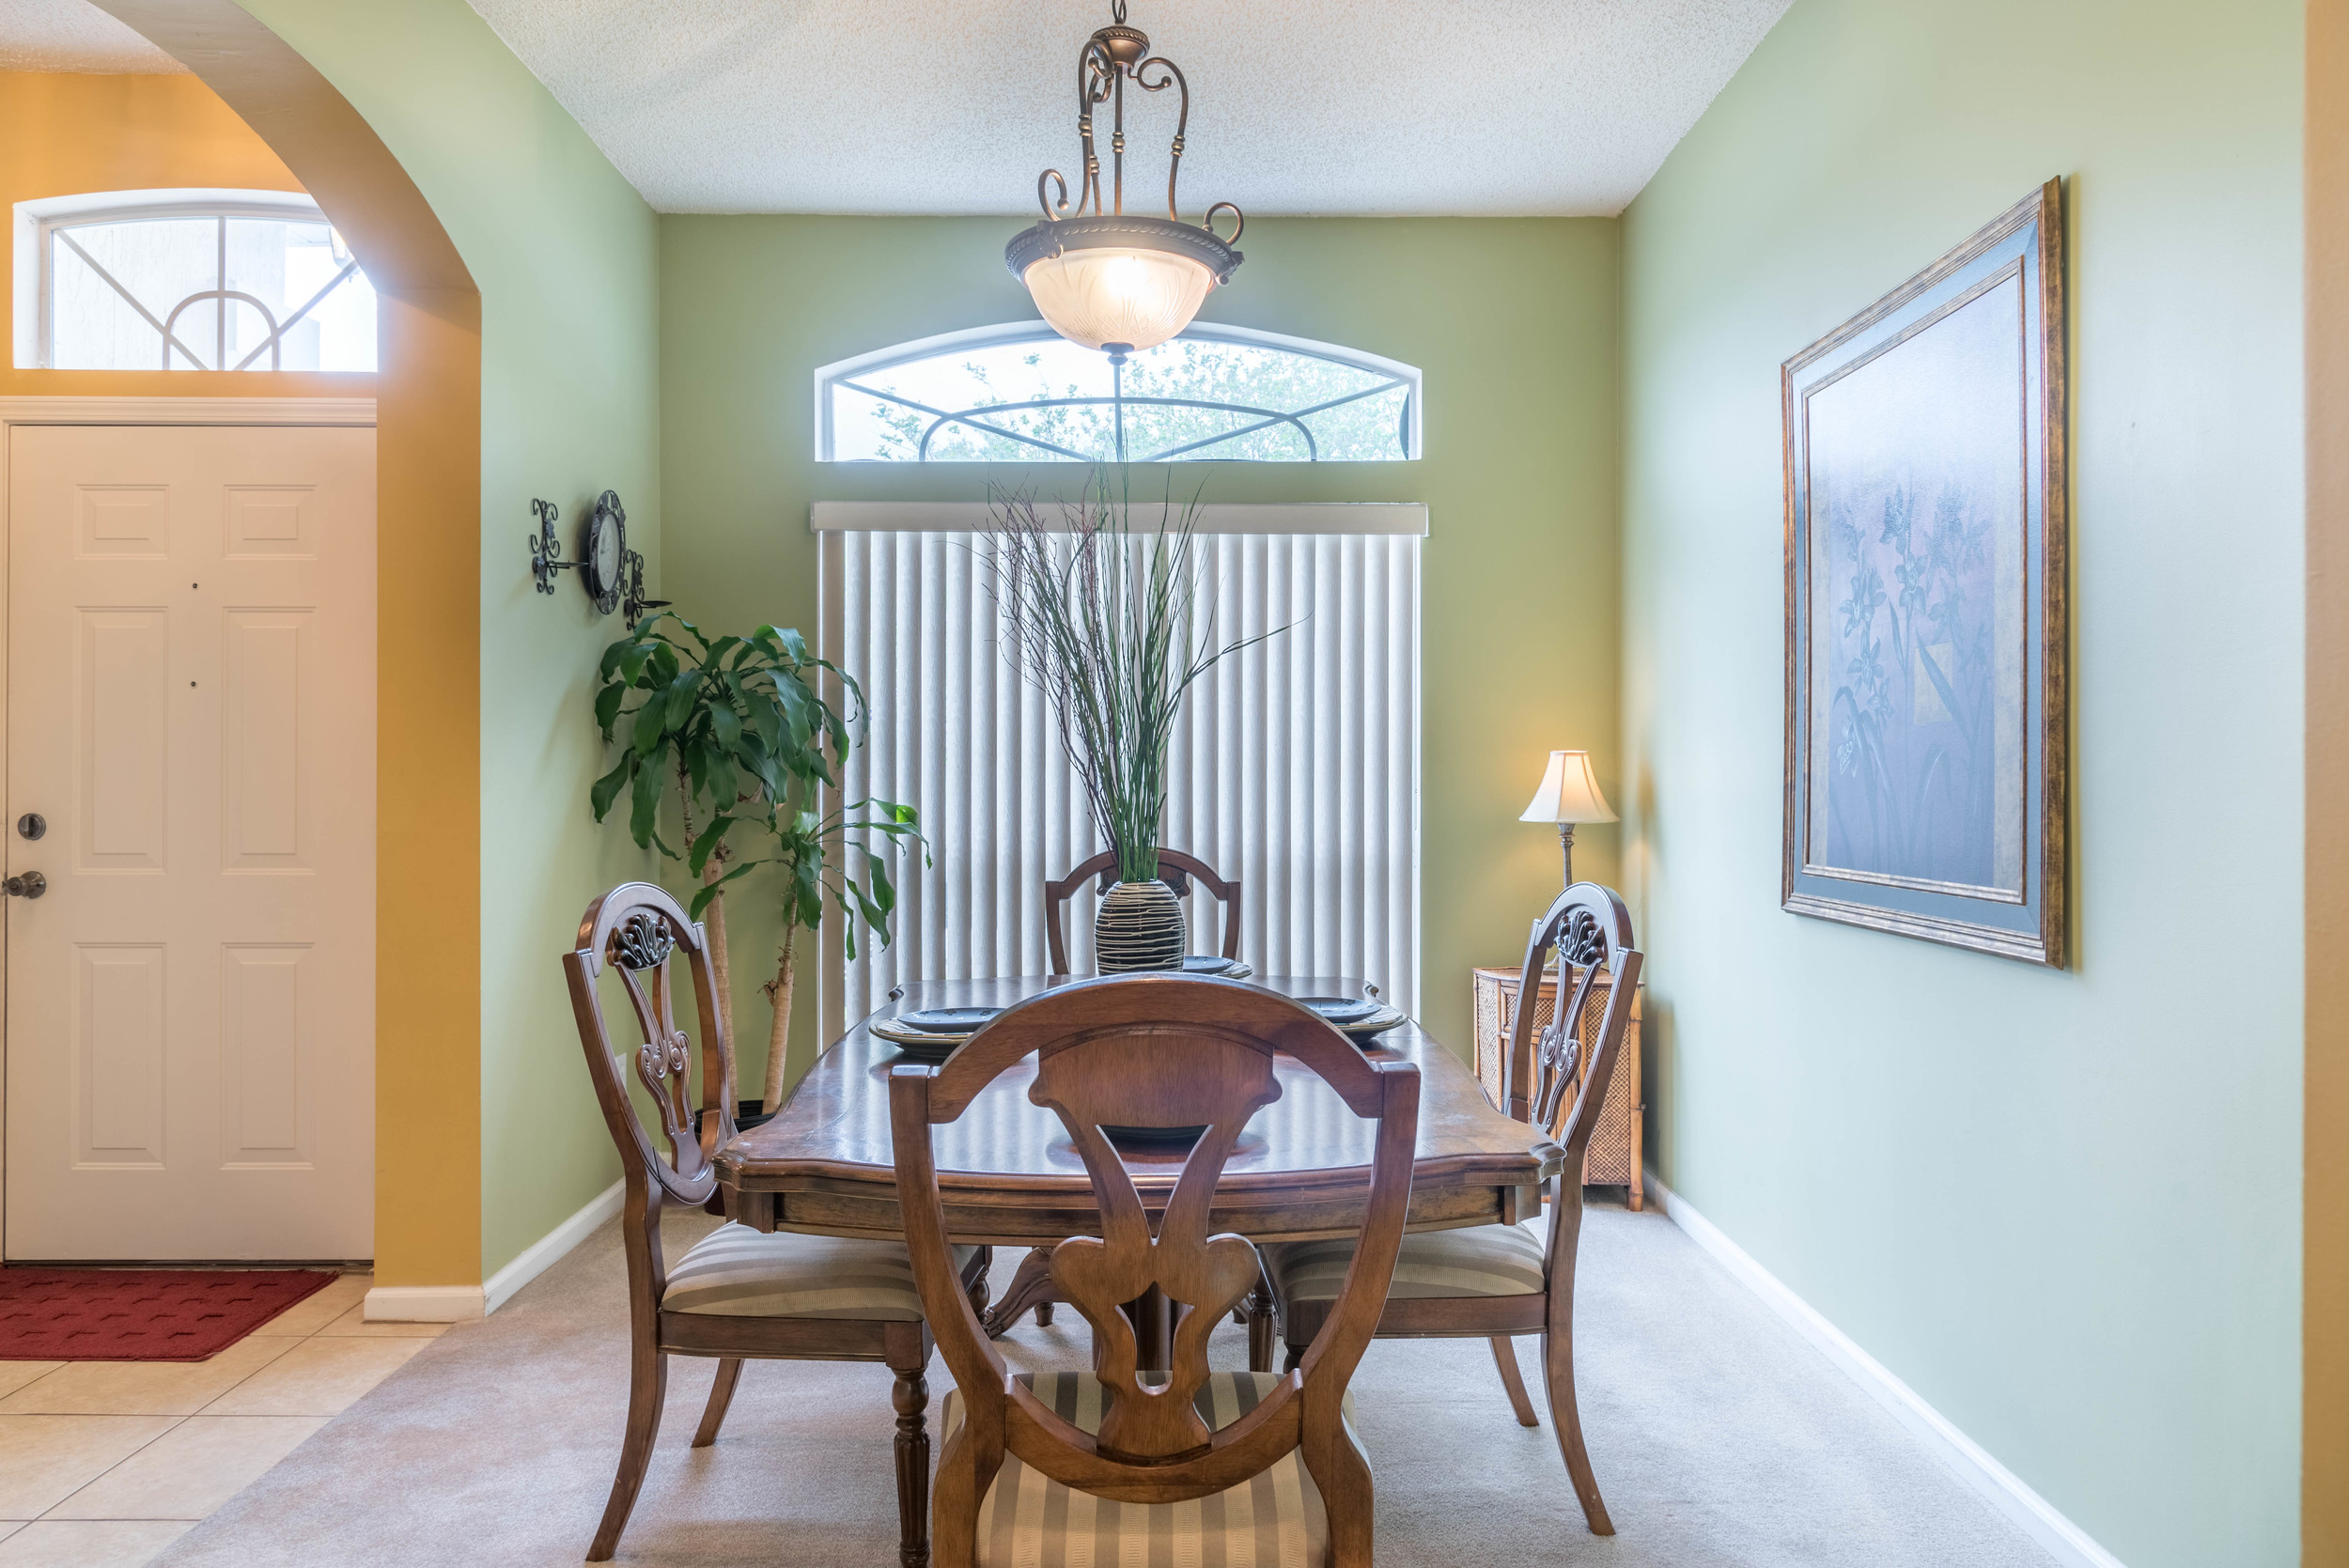
Take Full Control of Your Camera

 If you take a photo of a dark room with bright windows and let the camera do the thinking, it will try to balance the light coming in through the windows with ambient light in the room.

dark grainy real estate photo

What you want to do is tell the camera to forget about the windows, and expose just for the room.

bright real estate photo, exposed for the room

What you're looking for is something called "Exposure Compensation" or "Exposure Value" sometimes abbreviated to EV, the symbol looks like this.

exposure compensation

Then you're going to want to play around with the settings, set up your shot and snap a pic, if the picture looks too dark, try raising the exposure value and take another picture, it should be brighter. Keep raising it until you're happy with the results.


Staging

Staging is often overlooked when taking real estate photos but makes a huge difference.

Try your best to de-clutter the room before you photograph it, magazines laying on tables, power cords going across the ground, dirty dishes by the sink. These things subconsciously make the house look like it's going to be a chore living there. Don't forget to always put the toilet seat down when shooting bathrooms as well.


Well hopefully you've learned a little about taking better Real Estate photos with your cellphone, if you have any questions, or you are an agent in Jacksonville Fl looking to book a shoot, call or email me at (904) 302-3724 and Mike.Liddell.Photography@gmail.com

Thanks for reading! 

The Real Estate Photography Process: HDR vs Flash


There are two common approaches to taking interior photos, HDR and Flash. Let's talk a little about each one.


HDR


HDR stands for High Dynamic Range. Dynamic range is a pretty complex concept, but to put it simply:

Dynamic range is the difference between the lightest light and darkest dark which can be seen in a photo. Once your subject exceeds the camera's dynamic range, the highlights wash out to white, or the darks become black blobs.

photography dynamic range example

So basically the goal with HDR is to bring back detail in the highlights (sunlight coming in from windows) and also in the shadows (dark corners, under cabinets etc.)

Typically with an HDR photo, the camera will take multiple images with different exposure values; one overexposed, one underexposed, and one properly exposed, then you combine them together to create an "HDR" image. From the overexposed image it will bring in detail from the shadows, and from the underexposed image it will bring in detail in the highlights.


Here's the same picture from above after combining it with multiple exposures.

Mike Liddell Real Estate Photography Jacksonville HDR example


HDR gets a bad rap by many photographers, it can look unrealistic or cartoonish if done incorrectly, here's an example of bad, tonemapped HDR.

bad, cartoon-like HDR photography

I never use tonemapped HDR in any of my photography, instead I use what's called "Exposure Fusion" but we're not going to get into the difference between the two today.


Color Temperature


The biggest issue that arises with HDR, is when you have a mixture of different color temperatures. Sometimes you'll have daylight coming in through the windows, incandescent light from light fixtures, overhead fluorescent lights, and balancing them all out can be difficult.


Check out these images below, in the first one, the kitchen has proper white balance, but the living room has a blue tint from the sunlight coming in through the windows. In the second image, the living room is correct but the kitchen is way too warm.


color temperature example, the kitchen is colored correctly
color temperature example 2 the living room is color corrected

But with a little bit of skill with the brush tool, you can paint in the correct temperature to get a balanced image

final color corrected image

Flash


Using off-camera flash is the preferred method of many Real Estate photographers, but it's usually more time consuming on-location.

Although it usually takes more time to set up flashes and get a good image in camera, post processing for flash photography is almost always faster than processing an HDR image.

When using flash, the objective is to match the light inside of the room with the light coming in from the windows, so you get a nice bright interior and a clear view outside.


Jacksonville Real Estate photography Mike Liddell Flash example

One of the challenges that comes with using flash is lighting the entire scene. Take the image below for example, the kitchen is properly lit with a flash off to camera-right, but the living room is too dark.

jacksonville real estate example, the living room is too dark

To fix this issue, you can use another flash in the living room and fire both flashes at the same time, or if you only own one flash, move the flash and take a second picture and combine the two in Photoshop.


Here's the second photo with the flash only firing in the living room.

flash example 2, the living room is properly lit

 And here's the two flashes combined.

flash example 3 both the living room and kitchen are properly lit

Well hopefully you've learned a little about the difference between HDR and Flash photography, if you have any questions, or you are an agent in Jacksonville Fl looking to book a shoot, call or email me at (904) 302-3724 and Mike.Liddell.Photography@gmail.com

Thanks for reading!